
Camper Renovation 101
A young couple already blessed with a one-year-old and a baby on the way, ventured out to buy a 1997 camper with the hopes of renovating it to sell. The expansion of their family and other prior commitments postponed the renovation, but in the spring of 2024, the couple finished the complete renovation and decided to keep the camper for themselves instead of selling it.


Yes…this is us. We took on this project not fully anticipating all the work that was going to go into it, but we love our old camper with its new look. In this blog post, I will share everything we did to renovate our camper!
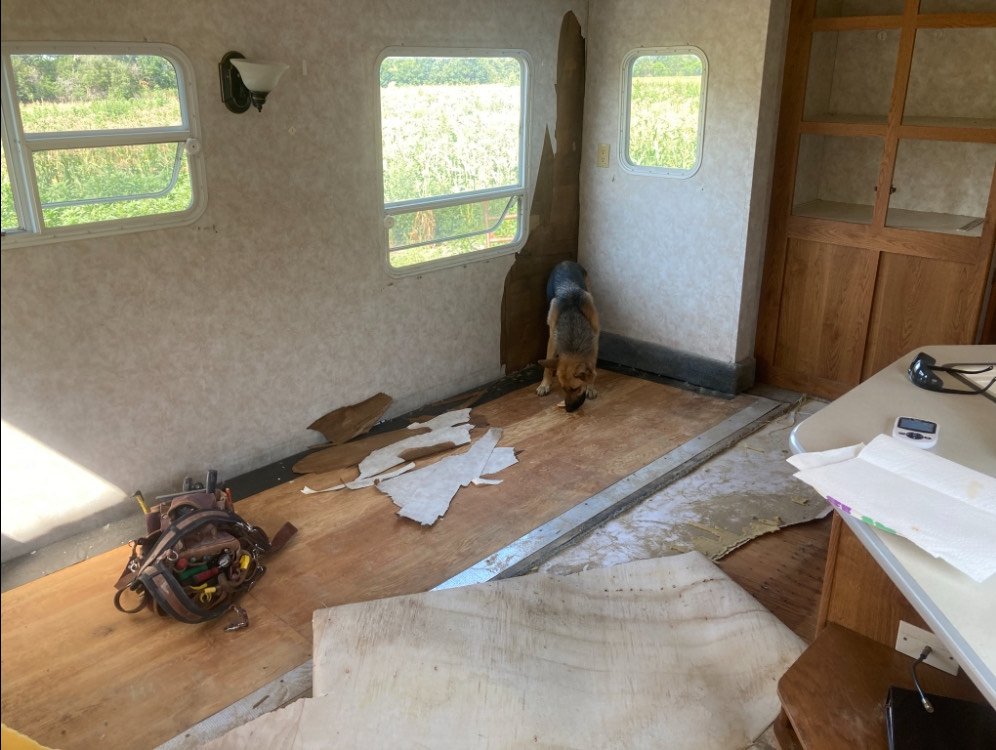
To anyone looking to renovate a camper, it is a big task yes, but what a fun task it can be! I will say, it would have been more fun for us if we had bought a camper that didn’t have any water damage. Which, with any old camper, you are going to be looking at some water damage no matter what, but if you are wanting to just make face renovations, don’t go with an older camper. Upon, gutting our camper, we realized we needed to completely repair two of the walls. That was a major setback, but once we had those repaired, we were on our way to success….for the most part! Ha!
I will break down our adventure into phases, tear out & painting, shiplap walls & flouring, countertops & cloud couch, modern updates & trimming.
Tear-Out & Painting
First things first, we tore out everything! All the couches, tables, countertops (not cabinets), flooring, etc. Once all of that was out, I removed all the cabinet doors and drawers. You want to make sure to label where they go, so when you are done painting, you know where to put them back on. I just used painters’ tape to do this and then removed the tape from the door and placed it next to the door/drawer when it was time to paint it. I also removed all the hardware from the doors and drawers. I didn’t worry about saving them, because I knew I wanted all knew hardware on them after painting.
I then took on the task of sanding everything. This will take a while, but you CANNOT skip this step. Getting a good sand will allow the paint to adhere to the walls and cabinets. I used 210-220 grit sandpaper. Using an orbital sander, I sanded the walls and cabinet doors. Then sanded all the cabinets and smaller parts of the walls, that I couldn’t get with the orbital sander, by hand. You want to be careful when sanding so that you do not sand through the material. The walls and cabinets are made of thin stuff, so you cannot sand them like normal wood. You just need to sand them enough to take off the finish and give the paint a rougher surface to adhere to.
Next, I washed all the walls and cabinets in the camper. You want to use a pretty aggressive solution to get all the grim from years of life off the walls.
Next PAINTING! I chose white and black for our camper, but before you get too excited about color you NEED to use a primer, even if your paint is a paint and primer. An oil based primer is best. I used Zinsser’s Cover Stain. It was amazing!! I use this on all my wood project now, especially if they are previously finished wood.
I even painted the FRIDGE!
Once you have primed everything, you are ready for paint. I used Behr Paint from Home Depot. I used their Ultra Pure White Matte Interior Stain-Blocking Paint & Primer and Limousine Leather One-Coat Hide Matte Interior Stain-Blocking Paint & Primer. The whited needed three to four coats, but the black only took one coat in most places.


It was helpful to have a small and a large roller. I loved having my 4-Inch Mini Paint Roller to paint the cabinets and smaller wall spaces. For my regular paint roller, I used these 9" Semi-Smooth Surface Roller Cover, because I wanted a nice smooth surface finish. I just used a paint brush, sometimes paired with painters tape, to trim around the edges.
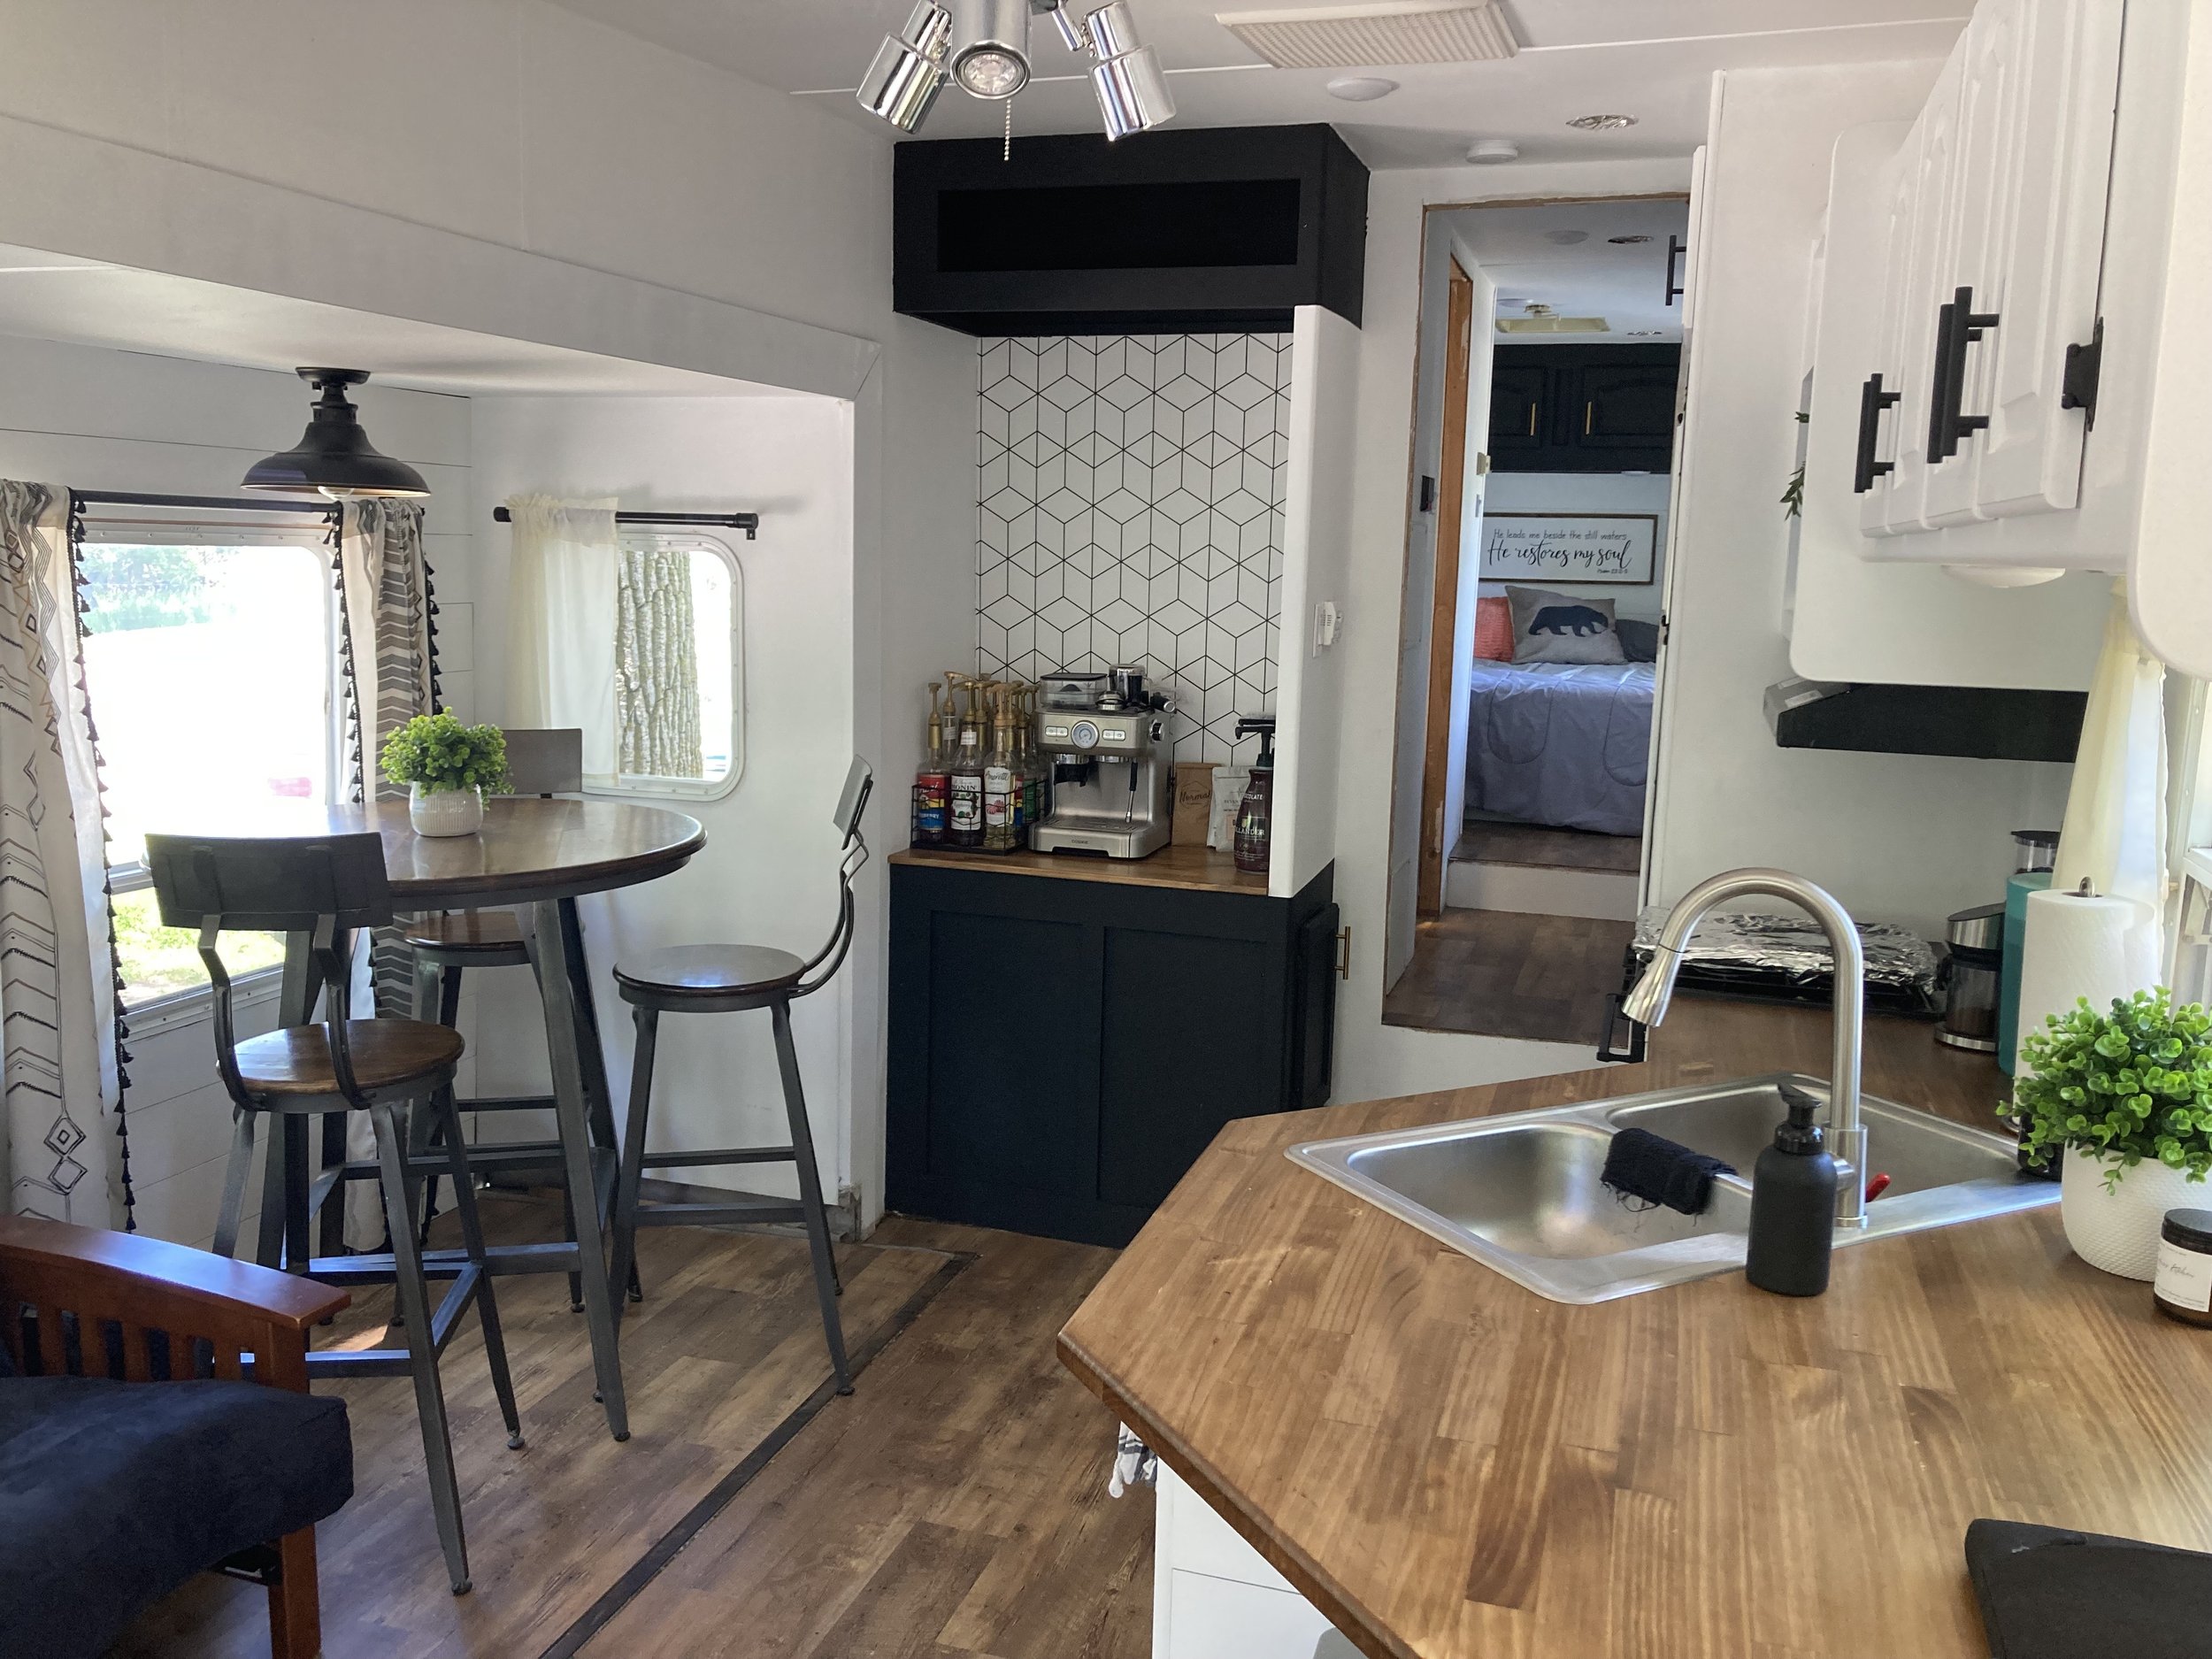
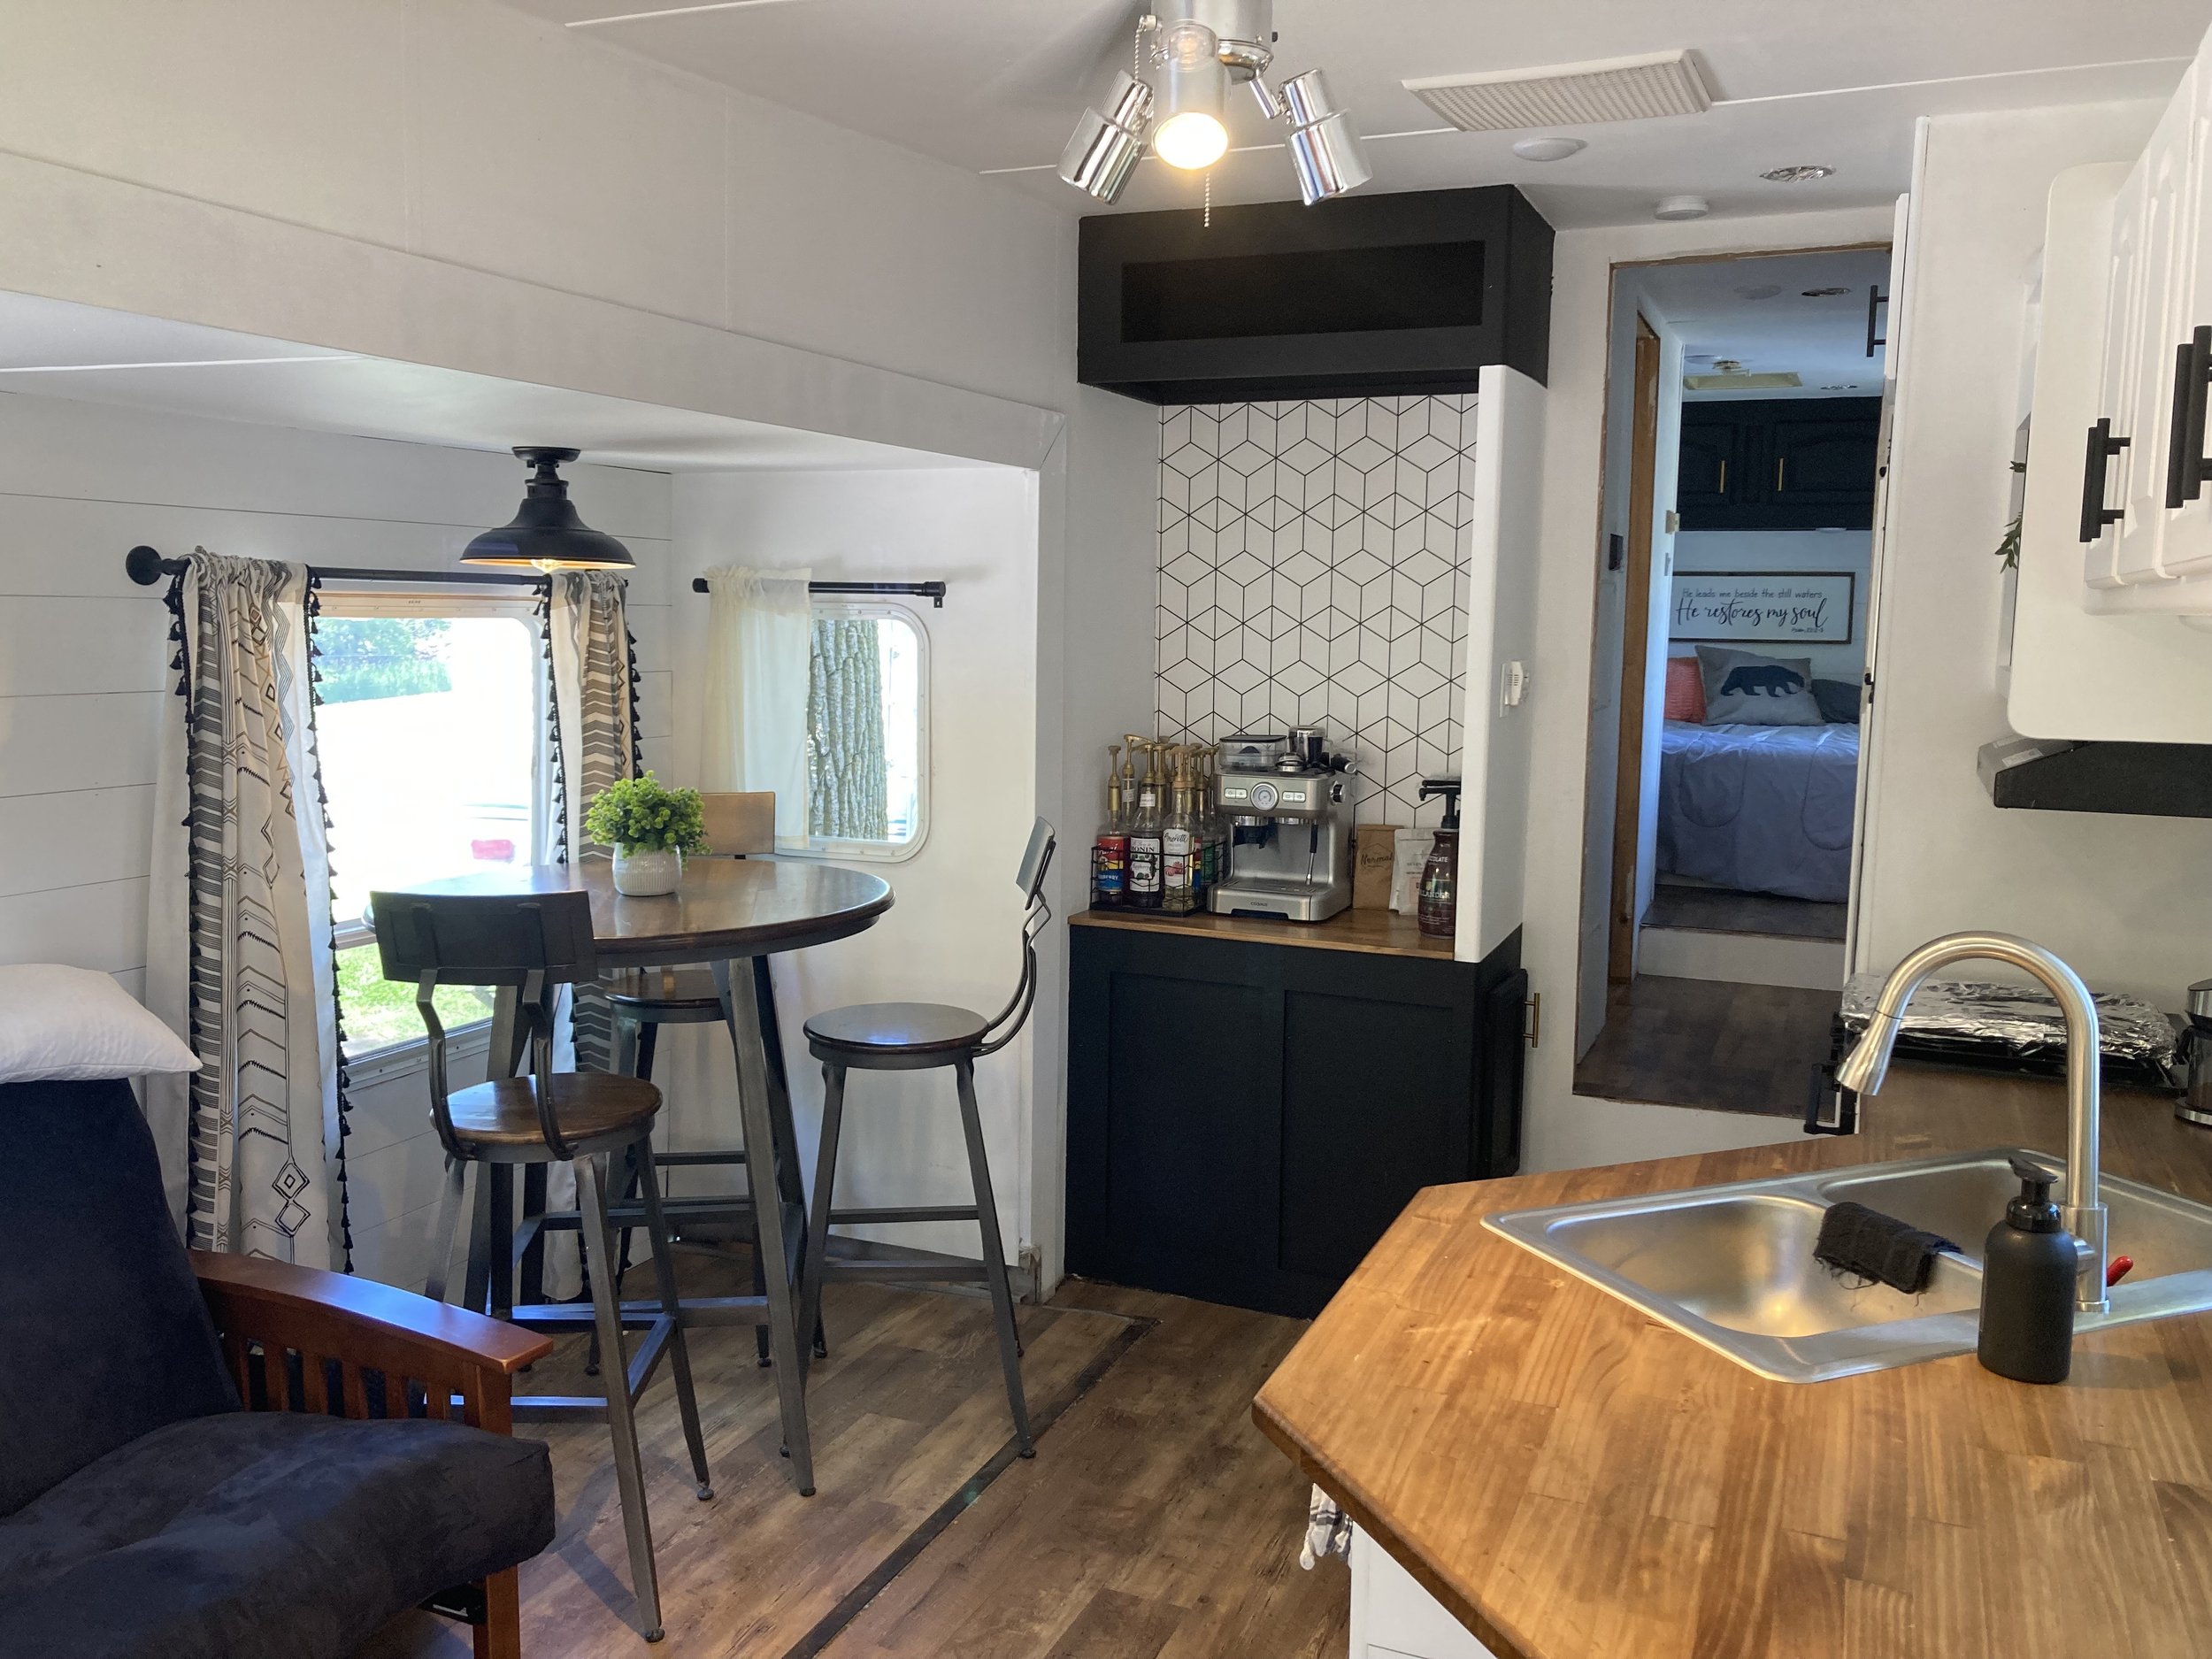
I wanted to add some fun wallpaper throughout the camper as well to add an extra wow factor. I didn’t worry about painting behind that, but I did prime it! We used this simple fun Geometric Peel and Stick Wallpaper. It added that extra factor to the camper that I was wanting.
I got new hardware for all the cabinets doors and drawers! I went with black handles on the white cabinets and gold handles on the black. As far as hinges go, make sure you get hinges that match the style of the old ones you removed, or they may not work with the style of cabinets in your camper. I went with black hinges on all the cabinets.
Shiplap Walls & Flooring
These shiplap walls were very fun! We didn’t end up going with conventional shiplap material due to weight and cost. We bought 1/8 inch plywood sheets from Menards. Using a table saw, we ripped them into strips as wide as we wanted them. We then sanded the edges to round them slightly and prevent splitting, to give it a finished look. I primed and painted the walls we wanted to shiplap white. I also painted the edges of the ripped boards before placing them onto the wall. With these boards I didn’t worry about using the oil based primer. I went right on them with the Behr paint & primer.
To put the boards on the wall we used wood glue and finish stapples. We used wood glue because there aren’t many studs in a camper to staple the strips to. Plus, a camper moves and shifts a lot and we wanted all of our lines to remain straight throughout all the movement. We placed nickels between each board to space them. I then painted the wall once all the boards where in place. We did this in the slide out, on the side of the kitchen base cabinets, and above the bed.


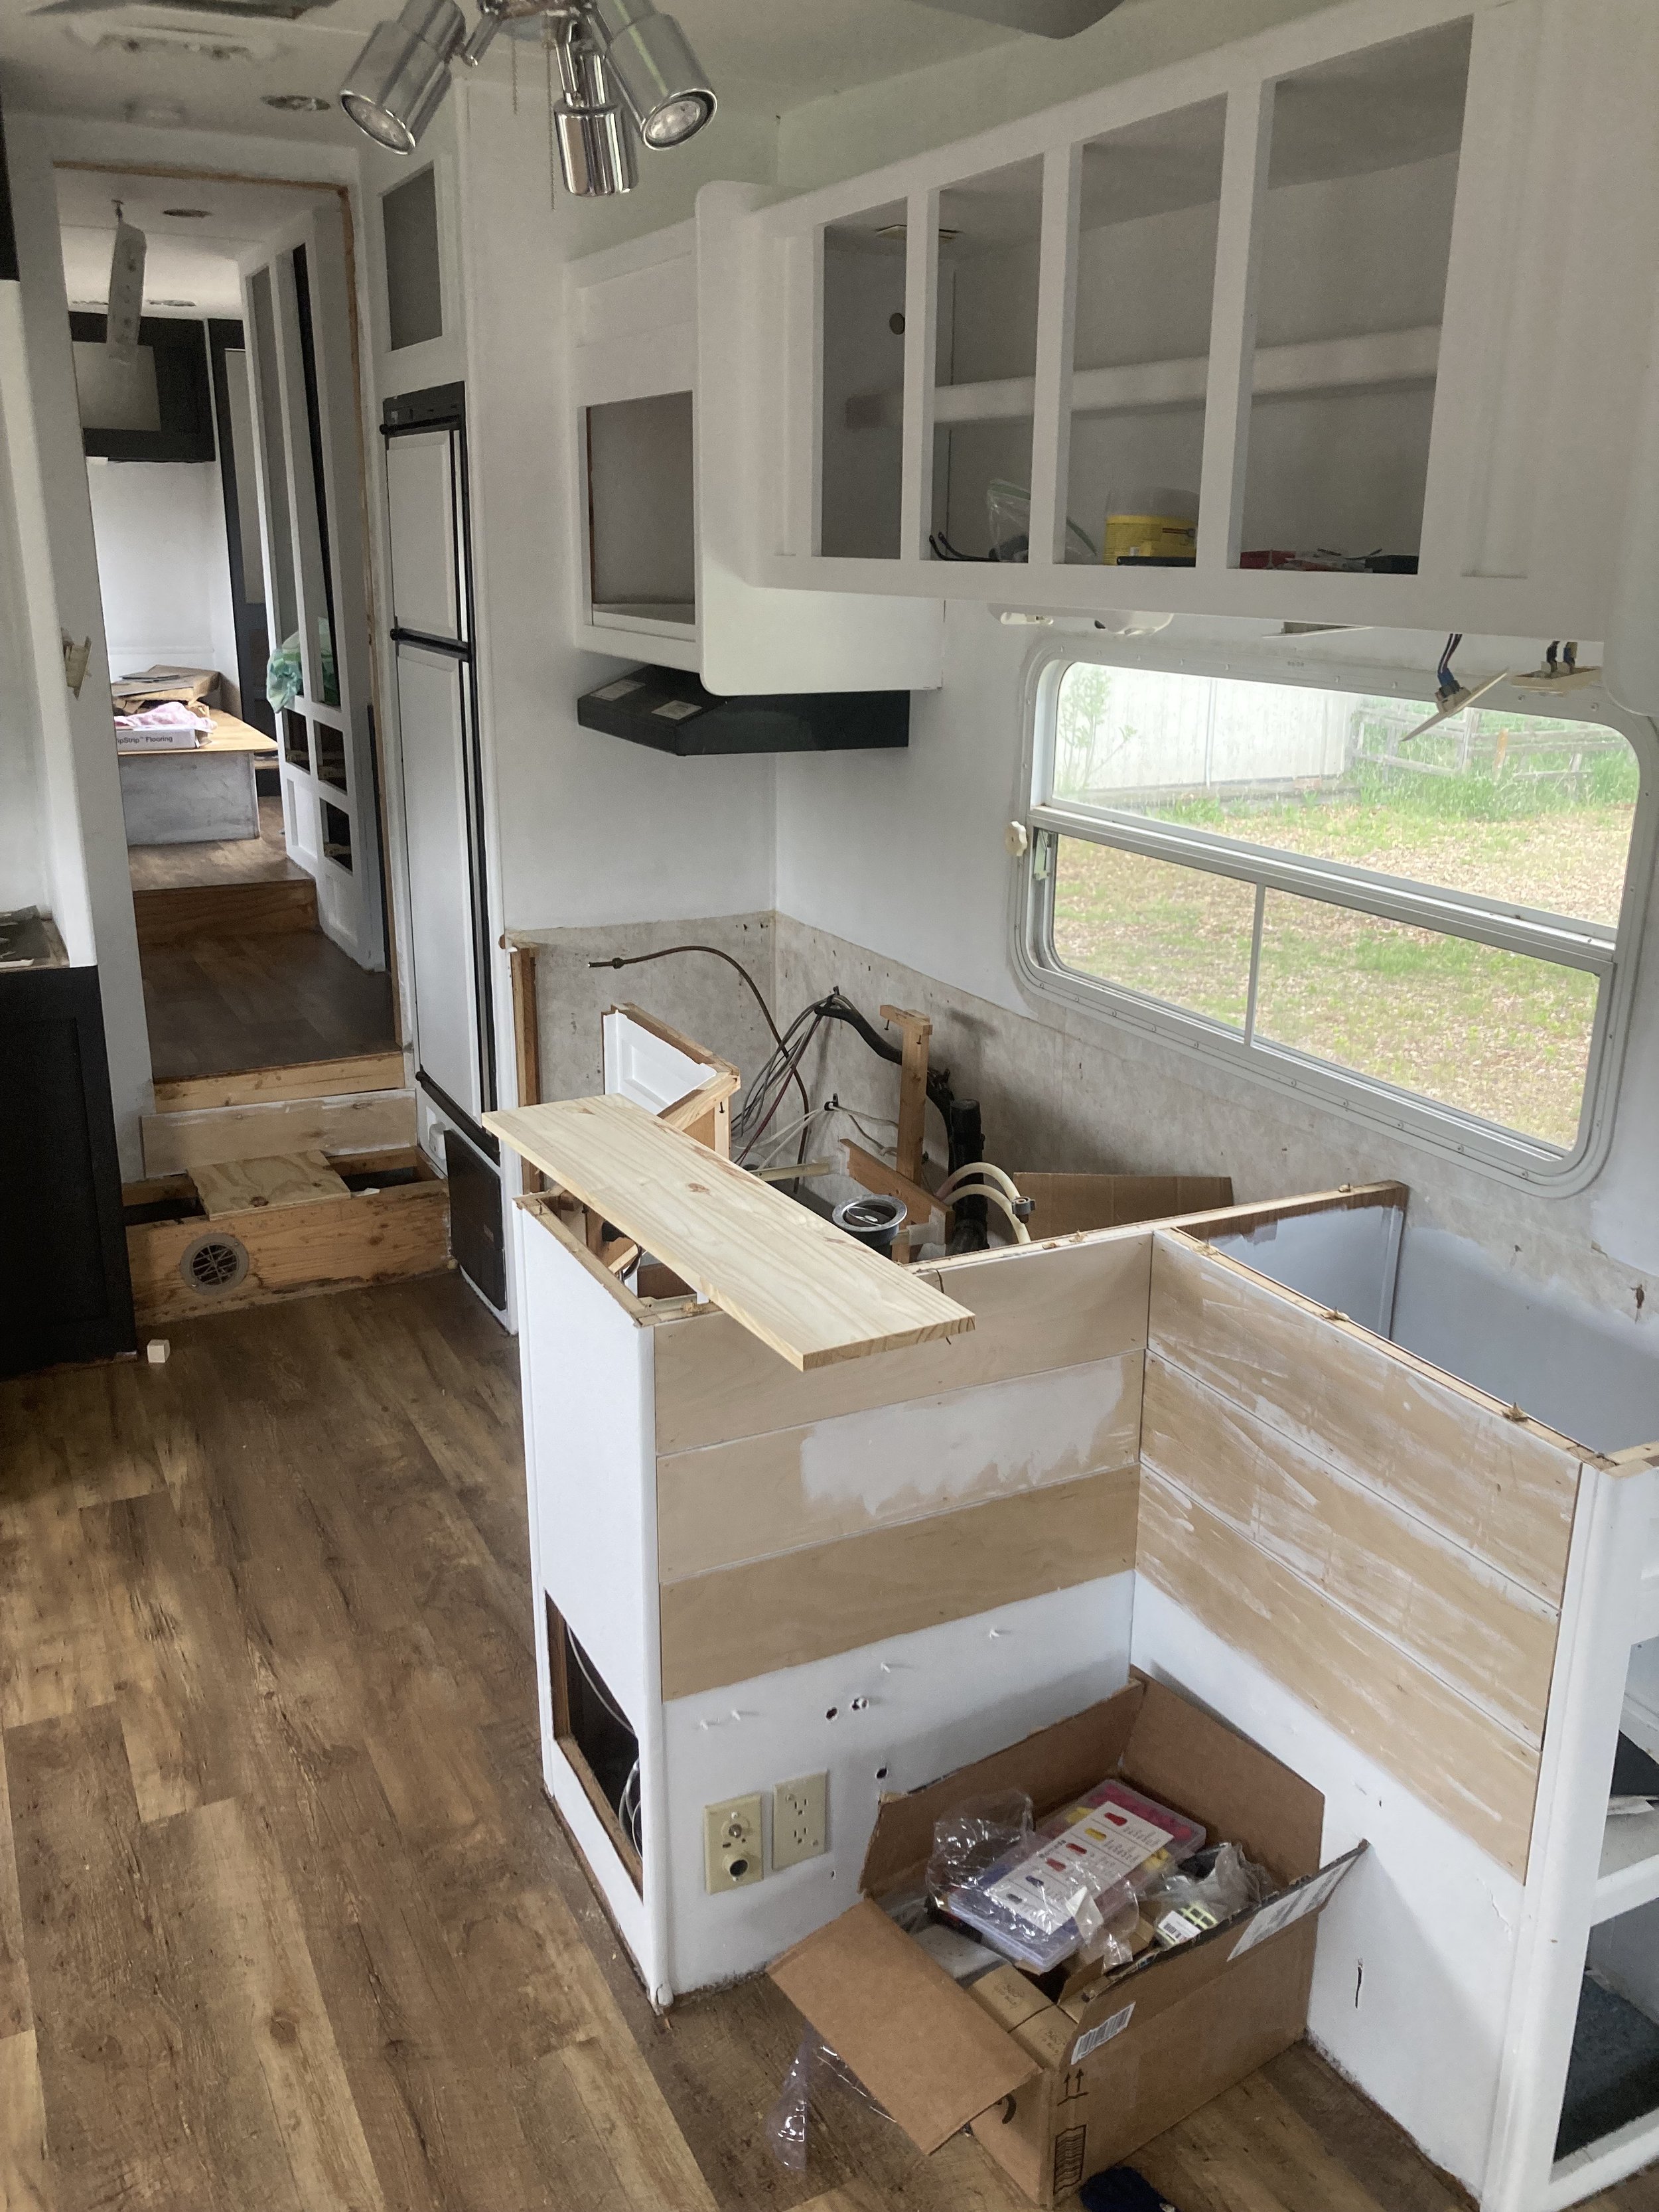
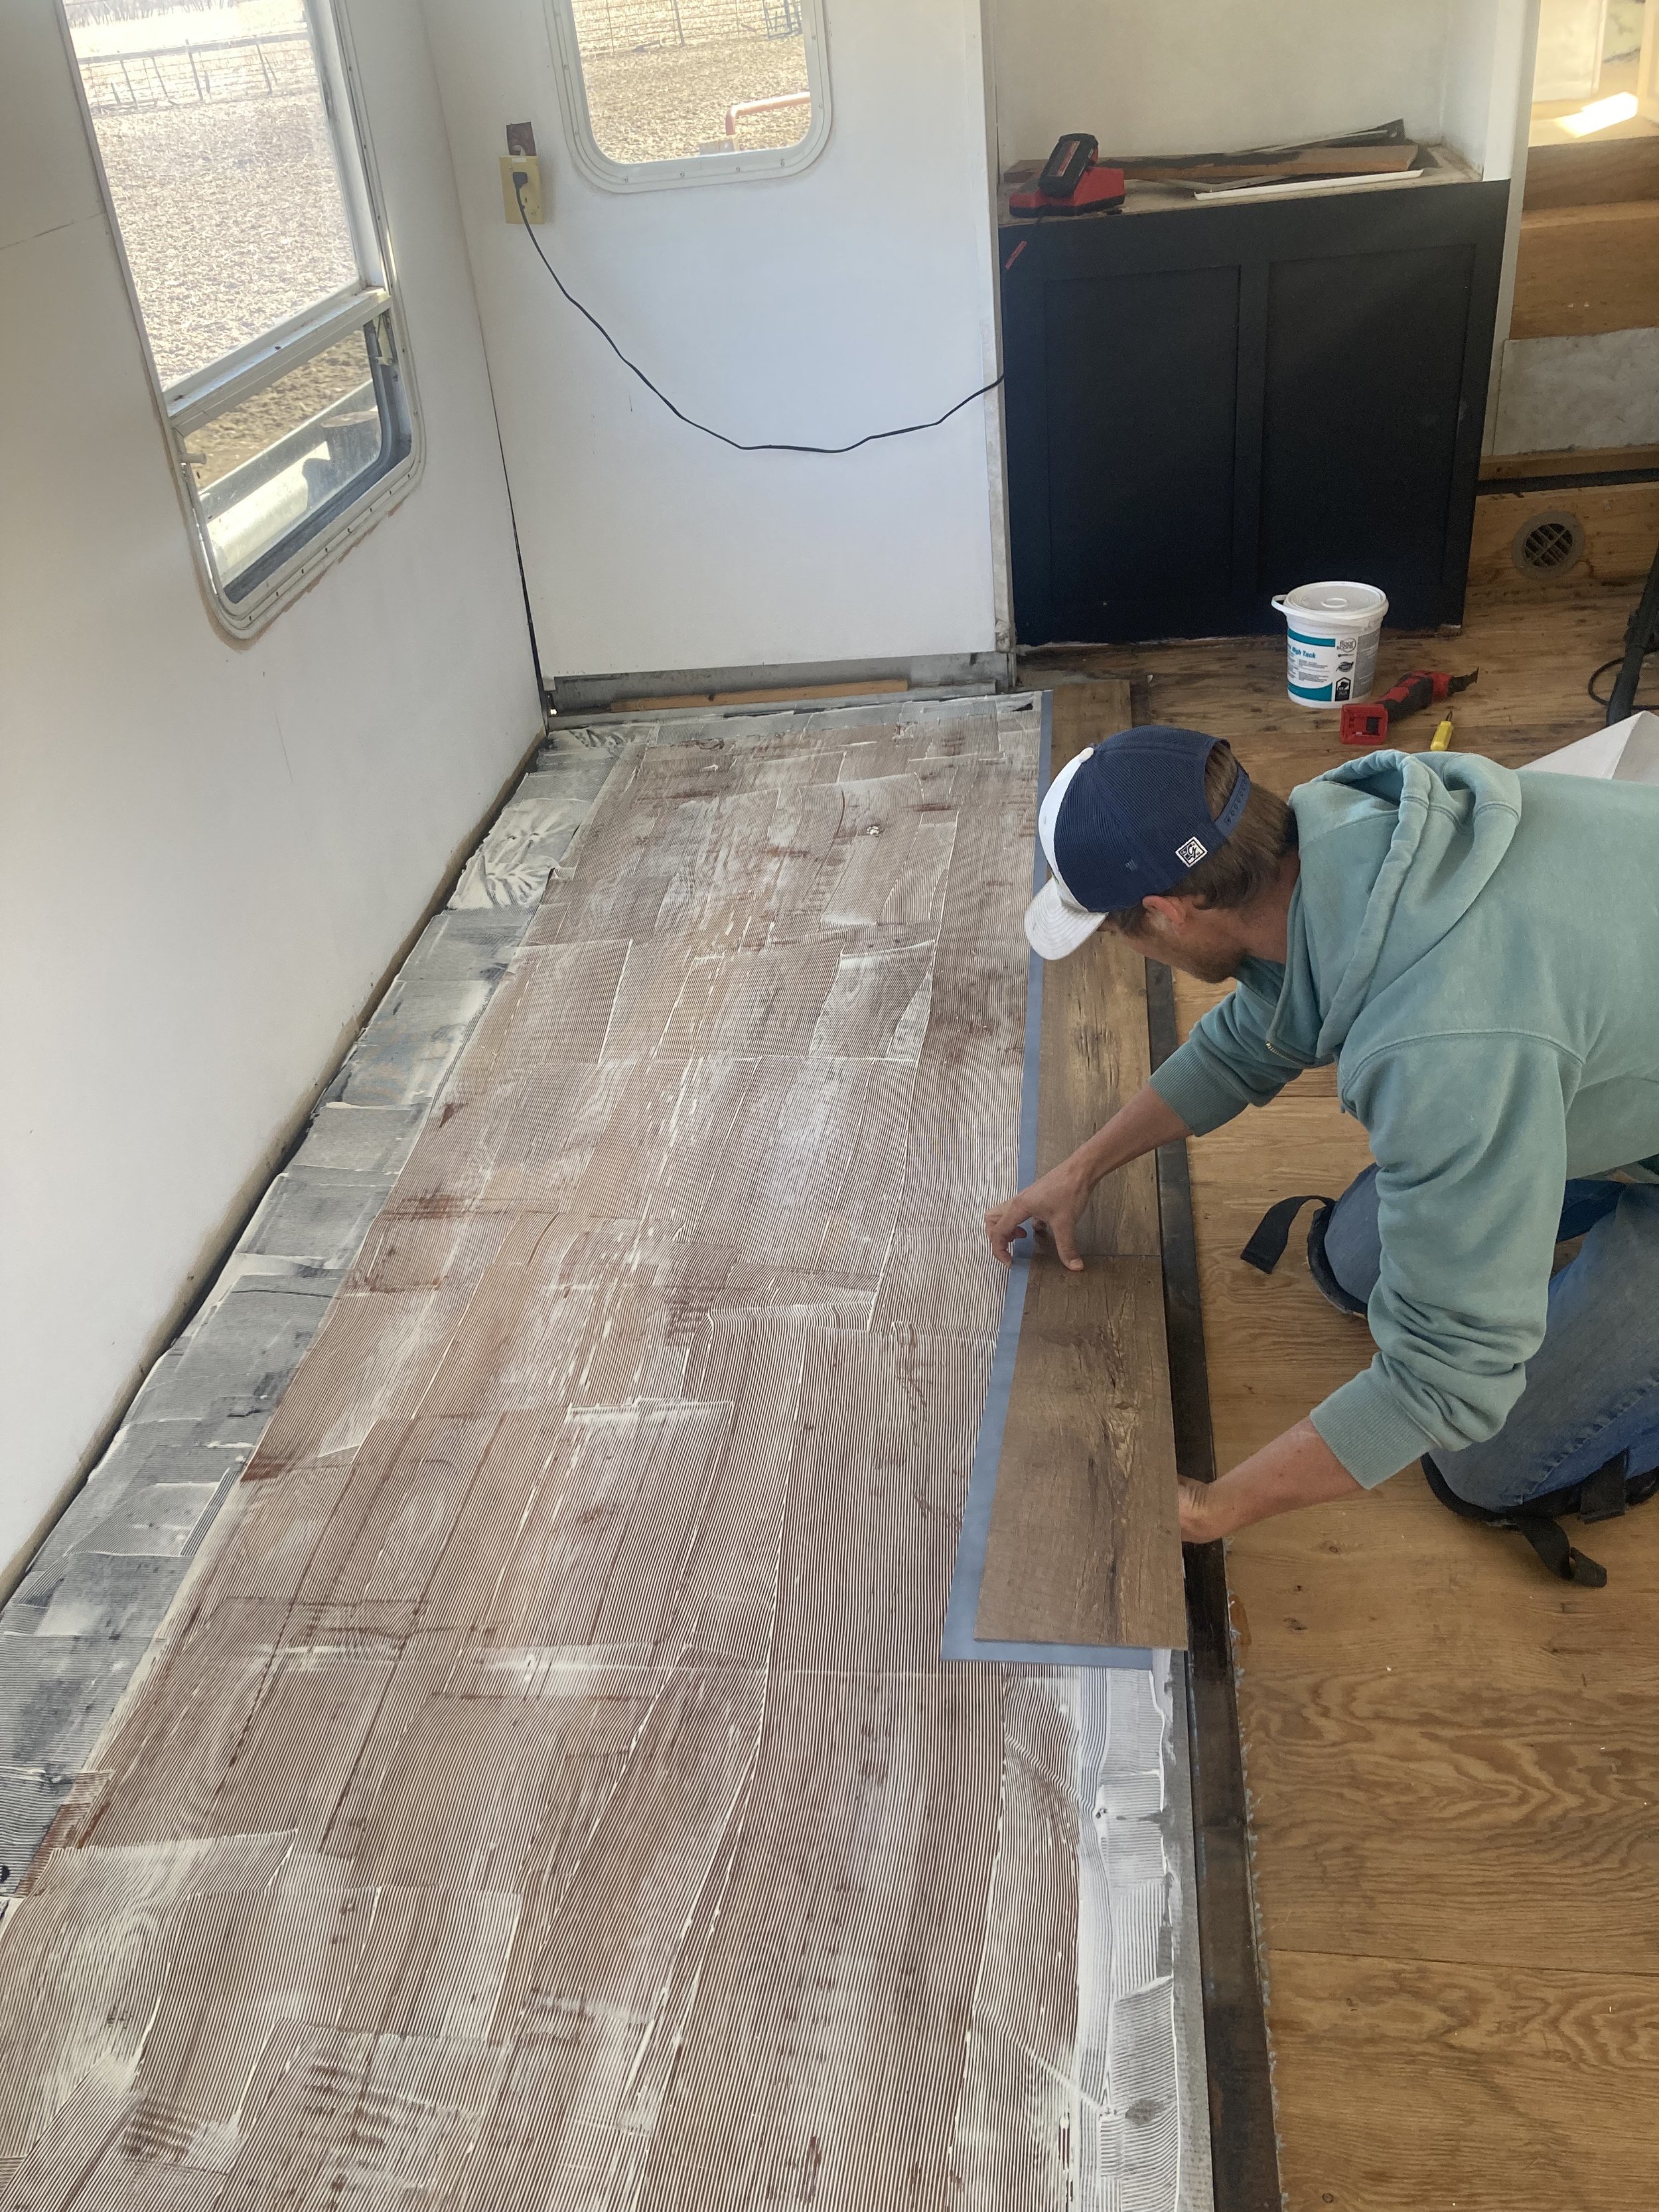
For the flooring we used this beautiful Grip Strip Water Resistant Luxury Vinyl Flooring. It is high quality and hides the dirt & sand that enters the camper very well! We also glued down the floor with flooring adhesive due to shifting of the camper. This has helped the planks stay in place.
We used a floor roller to make sure every part of the flooring adhered to the floor of the camper.
Countertops & Cloud Couch
For the countertops my husband made them from wood slabs we got at Menards. He glued them together, cut them to shape, sanded them, and stained them. Then he finished them with epoxy. We went with a matte finish on top of the epoxy as well, and I LOVED the final look! We put a new stainless-steel sink in the kitchen and a new sink in the bathroom as well with all new hardware.


We also made a cloud couch in the back of the camper. My husband framed it in so we could store blankets under the couch. I then bought a used couch to steel the seat cushions off of. I took the cloth portion off the cushions and washed them. Then I cleaned the cushions themselves by sprinkling baking soda over the top, let it sit overnight, vacuuming it up, and flipping them over to do another side, until all the sides were clean.
The color of the cushions didn’t match the color scheme of the camper, so I bought cushion covers to go over them. I then bought pillows and pillows covers to fill the back and sides of the couch. For the back I used 18”x 18” pillows and for the sides 12”x 20” pillows.

Modern Updates & Trimming
I replaced all the light fixtures, switches, and outlets in the camper. I used these modern puck lights on most of the ceilings, and then some Edison bulb fixtures and farmhouse fixtures to add some flare.
Because a camper is 12 volts, you need to buy 12 volt bulbs or they will not work in the camper. Also, when wiring in the new light fixtures, you may not use the ground wire of your new fixtures if it is on the 12 volt battery system. Some of your fixtures may be on a different system that only runs when connected to electricity and in that case, the ground wire is still necessary. The ceiling fan in our camper was this way.
There were a few fixtures in our camper that were on switches, but the new light fixtures I wanted did not have switches on them. There is a simple, easy solution to this problem. I bought these switches and added them to my lights.
Simply drill a hole big enough to fit the new switch in wherever you want it on the fixture. Then attach the switch to the fixture itself and wire it in by attaching the live wire in the fixture to one of the wires on the switch and the other wire on the switch, you will connect to the live wire in the wall/ceiling.
I also added new curtain rods and curtains to all the windows.


We then trimmed around the exposed doorways. We still need to finish up the trimming process, but she is functional. Ha!
Because a camper is built with the cabinets on top of the flooring, we have to trim around all of the floor to hide the old carpet and linoleum under the cabinets and walls. We are planning on using small one inch trim to do that.

Before & After


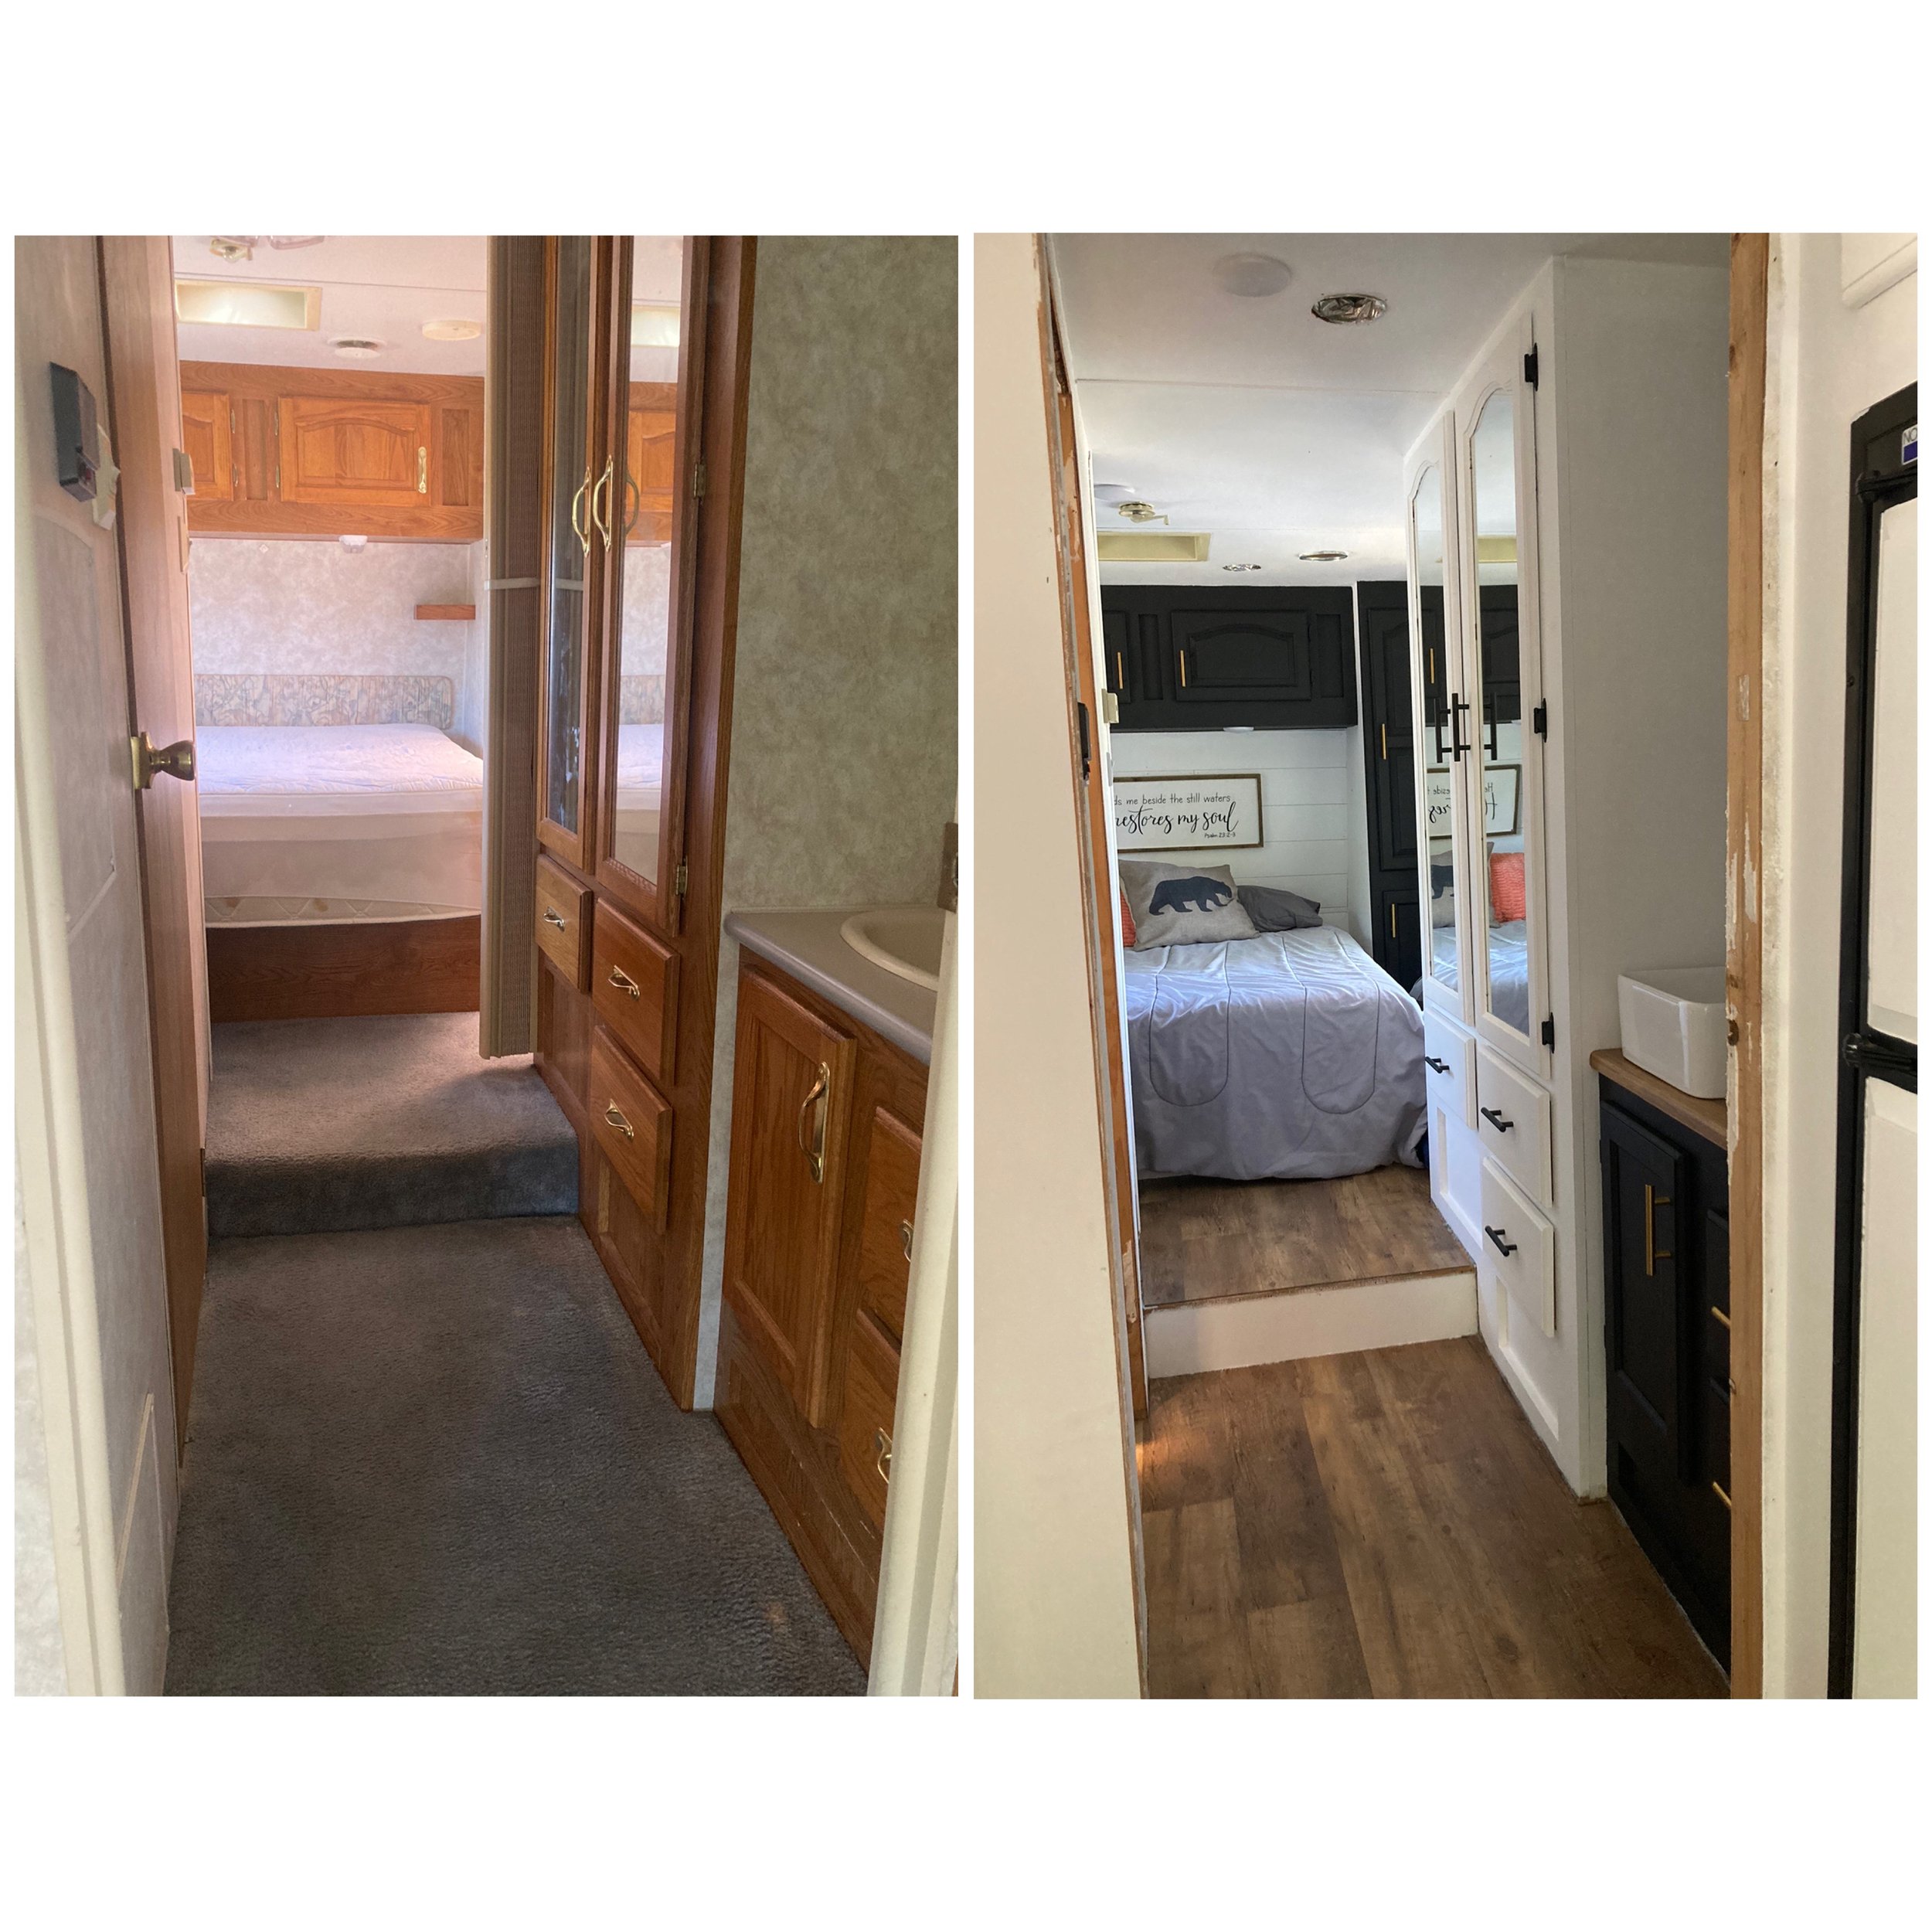
Yes, this young couple already blessed with three kids four and under, ventured out to buy a 1997 camper with the hopes of renovating it to sell. Instead, they named her Libby and are making lots of unforgettable memories with her instead!


